

Where Is The Mail Merge Wizard Located In 2021 And How Do I Change The Template
Lesson 30: Postal service Merge
/en/word2016/applying-and-modifying-styles/content/
Introduction
Mail Merge is a useful tool that allows you to produce multiple letters, labels, envelopes, name tags, and more using information stored in a list, database, or spreadsheet. When performing a Mail Merge, yous volition demand a Discussion certificate (you can start with an existing one or create a new one) and a recipient list, which is typically an Excel workbook.
Optional: If you'd like to work forth with the lesson, you can download the examples beneath:
- Practice document (Word document)
- Recipient listing (Excel workbook)
Watch the video below to learn more almost using the Mail service Merge feature.
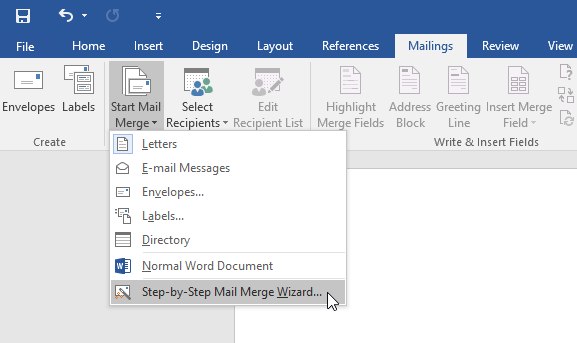
To use Postal service Merge:
- Open an existing Give-and-take document, or create a new one.
- From the Mailings tab, click the Commencement Mail Merge command and select Step-by-Pace Mail Merge Wizard from the drib-downwards menu.
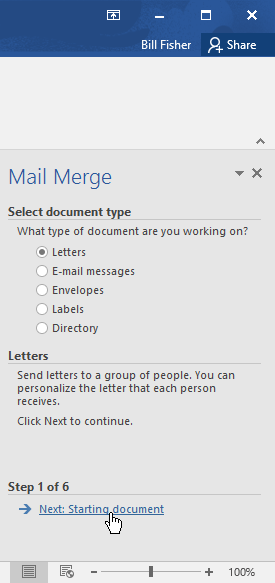
The Mail service Merge pane will appear and guide you lot through the six primary steps to complete a merge. The post-obit instance demonstrates how to create a course letter and merge the letter with a recipient list.
Step ane:
- From the Mail Merge task pane on the right side of the Word window, choose the type of document y'all want to create. In our example, nosotros'll select Letters. Then click Next: Starting certificate to move to Stride 2.
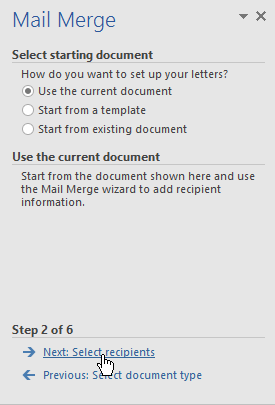
Pace two:
- Select Use the electric current document, then click Next: Select recipients to move to Step iii.
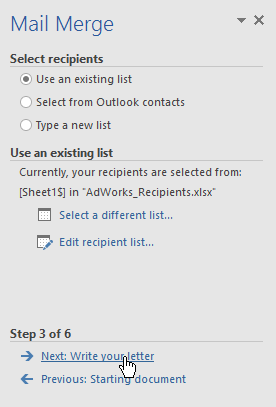
Pace 3:
Now you'll demand an address list so Discussion can automatically place each accost into the certificate. The list can be in an existing file, such every bit an Excel workbook, or you can blazon a new address list from inside the Post Merge Wizard.
- Select Use an existing listing, then click Scan to select the file.
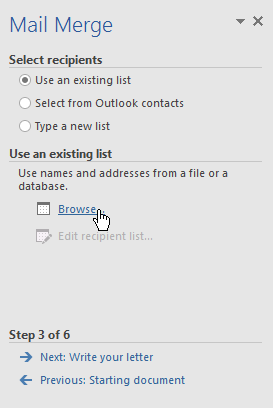
- Locate your file, so click Open up.
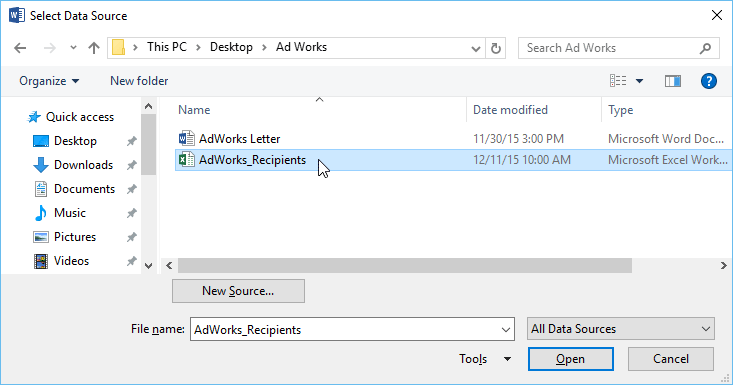
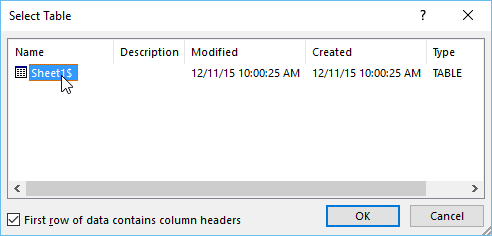
- If the address list is in an Excel workbook, select the worksheet that contains the listing, then click OK.
- In the Postal service Merge Recipients dialog box, you tin can check or uncheck each box to control which recipients are included in the merge. By default, all recipients should exist selected. When you're done, click OK.
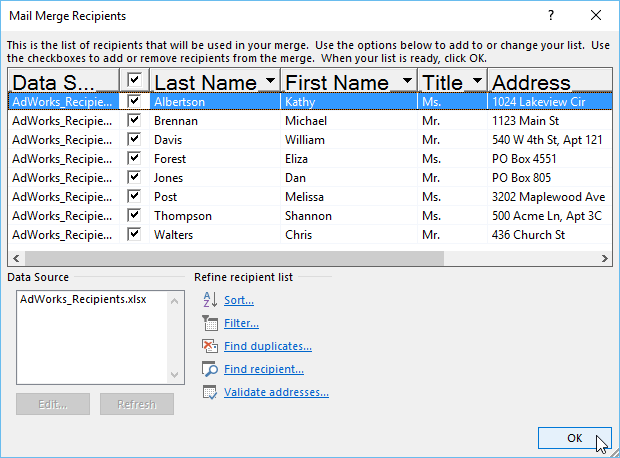
- Click Next: Write your letter to move to Step 4.
If yous don't have an existing accost list, you can click the Type a new list push and click Create, then type your accost list manually.
Step 4:
Now you're ready to write your letter. When it's printed, each re-create of the alphabetic character will basically be the aforementioned; merely the recipient data (such as the name and accost) will be dissimilar. You'll demand to add placeholders for the recipient data then Post Merge knows exactly where to add the data.
To insert recipient data:
- Place the insertion point in the certificate where you want the information to appear.
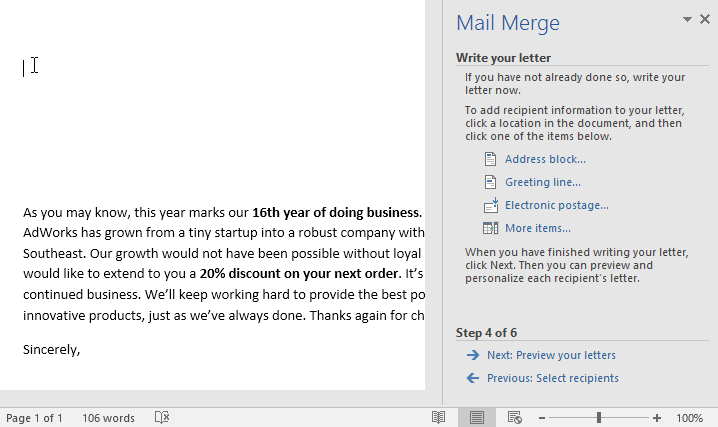
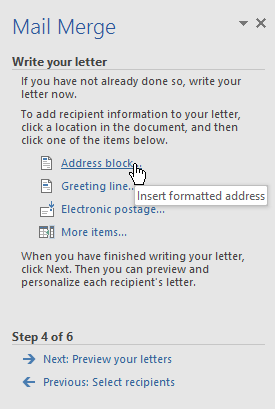
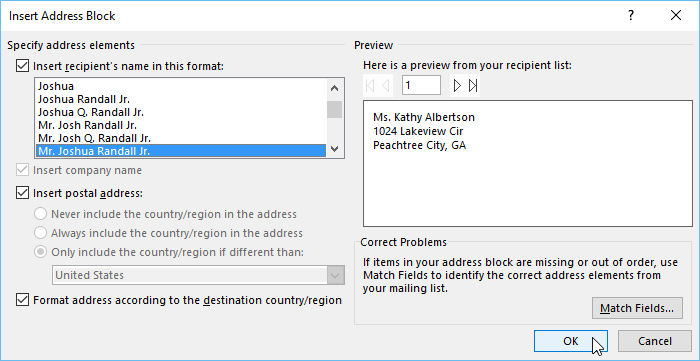
- Choose 1 of the placeholder options. In our example, we'll select Address cake.
- Depending on your option, a dialog box may appear with various customization options. Select the desired options, then click OK.
- A placeholder will appear in your document (for example, «AddressBlock»).
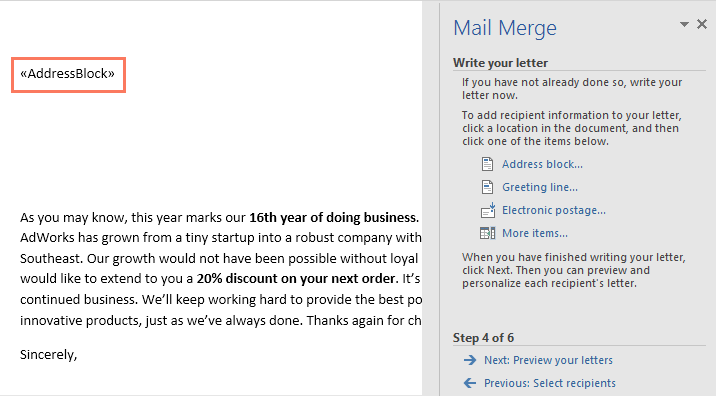
- Add whatever other placeholders you desire. In our instance, we'll add a Greeting line placeholder only higher up the body of the letter.
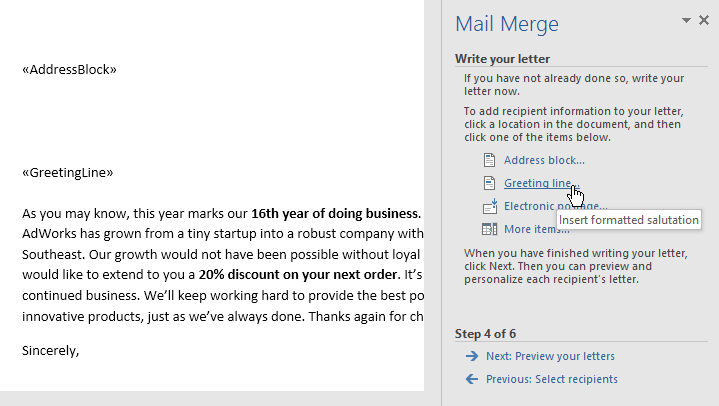
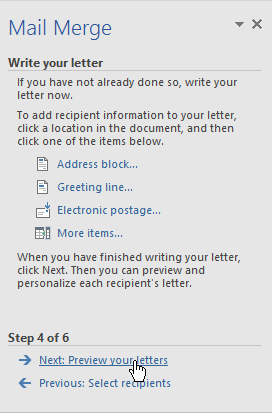
- When yous're done, click Next: Preview your letters to movement to Step 5.
For some letters, you'll just need to add an Accost block and Greeting line. Simply you can also add more placeholders (such as recipients' names or addresses) in the torso of the letter to personalize information technology even further.
Step v:
- Preview the letters to make sure the information from the recipient list appears correctly in the letter of the alphabet. Yous can apply the left and right scroll arrows to view each version of the document.
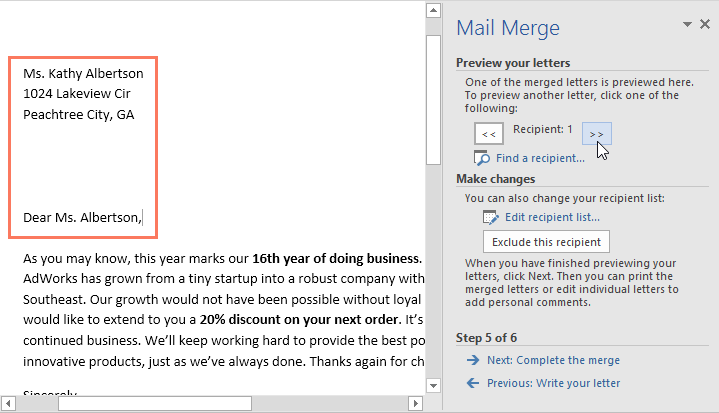
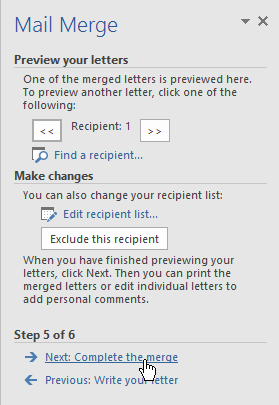
- If everything looks correct, click Adjacent: Complete the merge to motion to Step 6.
Footstep 6:
- Click Print to print the messages.
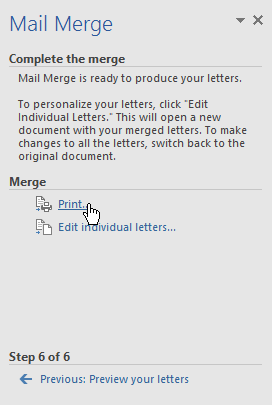
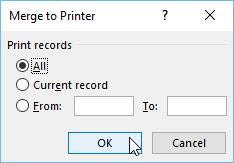
- A dialog box will announced. Decide if you want to print All of the letters, the current document (record), or merely a select group, so click OK. In our case, nosotros'll print all of the letters.
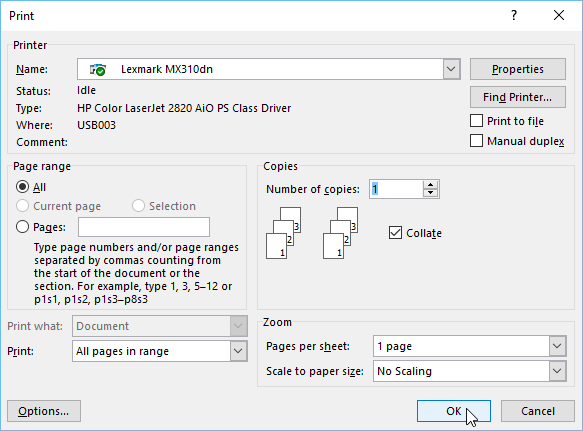
- The Impress dialog box will announced. Adjust the print settings if needed, then click OK. The letters will be printed.
Challenge!
- Open our do document and do recipient list.
- Employ the Mail Merge Magician to merge the letter with the recipient listing.
- Insert an accost block at the top of the document. Choose the 2d format: Joshua Randall Jr.
- Higher up the torso of the letter, insert a Greeting Line. Format the greeting line and then information technology says Mr. Randall,
- Check your letters to make sure they are formatted correctly. Your third letter should await something similar this:
- Complete the merge.
/en/word2016/buying-function-2016/content/

Where Is The Mail Merge Wizard Located In 2021 And How Do I Change The Template,
Source: https://edu.gcfglobal.org/en/word2016/mail-merge/1/
Posted by: rosstooll1958.blogspot.com
0 Response to "Where Is The Mail Merge Wizard Located In 2021 And How Do I Change The Template"
Post a Comment