

How To Remove Indesign Template Header

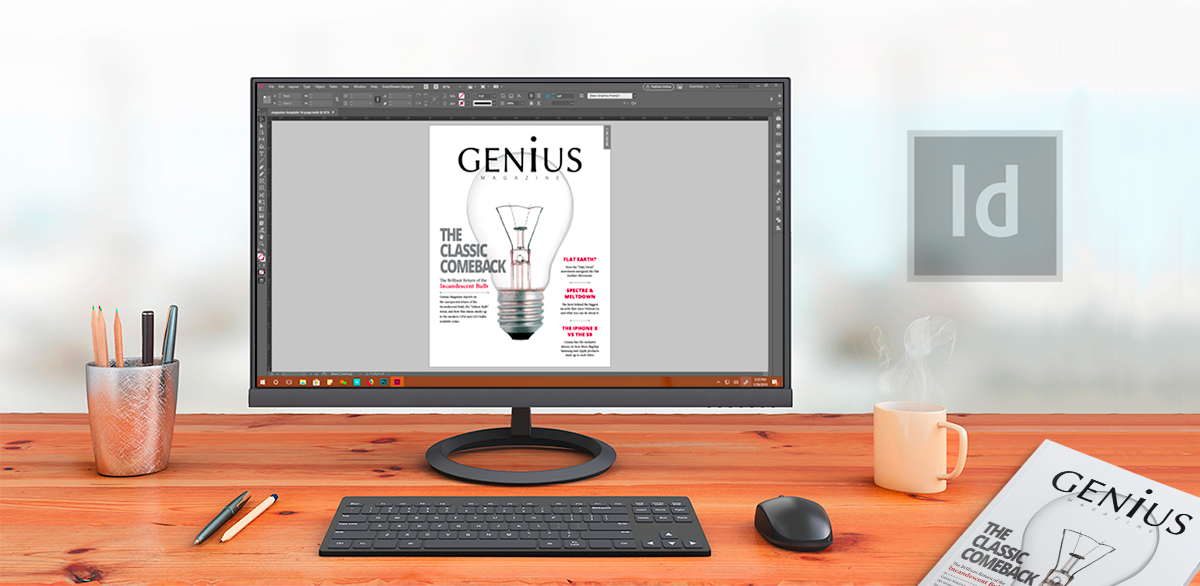
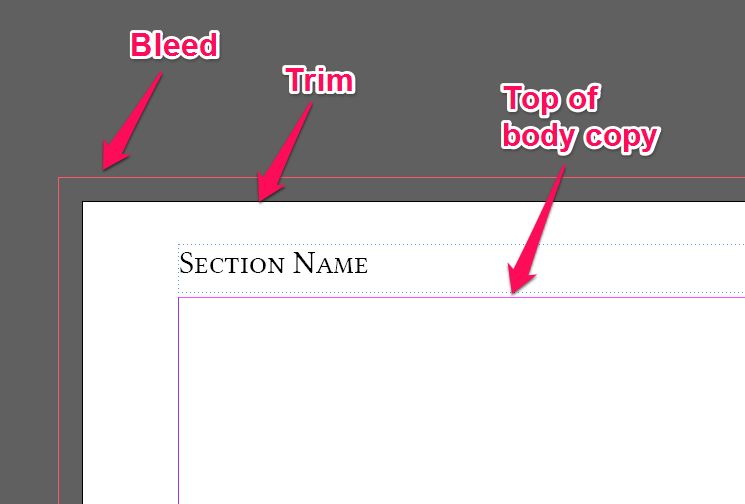
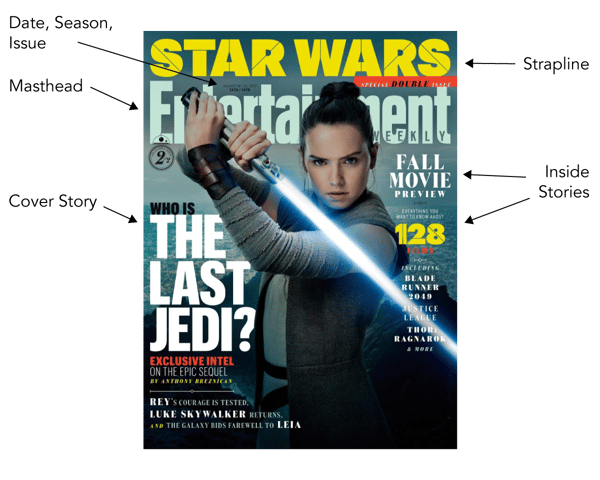
Allow's face information technology, magazine design can be fourth dimension-consuming and expensive. When start-upwardly magazines beginning open their doors, coin is tight, and keeping the budget skinny is important. Although yous may not have the in-house staff to completely produce your magazine, agreement the process and being able to practise some edits on your own can be a life saver. Fifty-fifty if you do have the in-house staff, it might be a challenge getting properly formatted files to the printer on-time and on-upkeep. If this is you, and you take a Creative Cloud subscription (commonly starting at well-nigh $70/mo for businesses), you lot can rein in expenses and creative control by building your own template. To help you lot with this challenge, I've put together this step by step tutorial. Before nosotros get started, have advantage of the free template download so you can follow along. Or if you would rather accept us design a custom template for you, hit the "Talk to an Good" button. First let'south create a new document. Yous should create the document using the following settings (as shown in the paradigm above): Leave the balance on their default settings. Information technology's important to add the quote (") at the cease of your height and width values, since InDesign defaults to Picas. Your top and width values should be gear up to 51p0 10 66p0 Picas with a 0p9 bleed. It's important to properly setup your bleeds, equally this allows graphics and colors to be printed right up to the border of the paper. This is a key graphical technique that adds impact and professionalism to your magazine. One powerful feature of InDesign is the ability to setup Master Pages. Think of information technology as a set up of templates that we employ to build pages throughout the book. You can build them for any layout yous demand, and InDesign will permit you lot utilize them with the click of the mouse. Setting up your Master Pages now will make it easier adjacent time y'all create a book in InDesign. Double-click "A-Master" in the Pages palette (F12) to enter the Master Page editor. Once there, follow the steps outlined below: Build your header: Try to keep enough clearance to a higher place the top of the body copy that the header doesn't crowd into it while keeping information technology safely abroad from the trim area. Note that some magazines don't use a page header, and it's totally fine to go out it out. You tin can even have it on one side only, or maybe employ a modest image. Get artistic! Creativity is what magazines are all well-nigh. Build your footer: You tin can also put other information downwardly here, such as the brand proper noun, website, issue date, etc. Build your text surface area: At present that we accept our Certificate and Primary Pages setup, we can offset thinking about our blazon styles. This is a very important choice. Your conclusion hither will impact your reader's power to empathise your content. We won't get too deep into Paragraph Styles hither. If you lot desire to larn more well-nigh how to build and apply them , bank check out this folio. Hither are some mutual Paragraph Styles you might need in a Magazine: Body Type Body Type You should always start with your body type. Since more than lxxx-ninety% of your magazine will use this way, and then it should be your pinnacle concern. Apply a font that is ledgible in large blocks of modest type. Be sure to requite information technology a little breathing room to make it easier on your reader'south eyes. Keep in mind your audience age, interests, and the brand persona yous're trying to communicate. Headers You'll need at least i type of header. This could be a chapter header, section header and a sub-header. Because at that place is very petty type using these styles, information technology's OK to get a bit more creative with headers. Page Headers and Footers It's non a bad idea to make a Paragraph Style for the page headers and footers nosotros created in Step 2. A smaller, italicized version of our Body Type would work hither. They say you can't guess a book by it'south cover, only when it comes to someone picking up your magazine, that is exactly what they do. It'south important to create an engaging, center-catching cover that communicates what the magazine is about, and what readers can expect to detect within. Now that nosotros accept our template setup, all that's left to practice is to add content! There are several ways to practise this. Try to effigy out what works best for you lot and your workflow. When you're ready to go, you tin can consign your book as a print-set PDF file directly from InDesign past choosing File > Adobe PDF Presets > [Printing Quality]... or past using the task options supplied by your print provider. That's Information technology! That'due south It! I hope you enjoyed learning how to design a mag in InDesign. If yous have any questions, feel free to sound off in the comments below. The template pack provided in the download has styles, Chief Pages and other goodies. Then I recommend downloading it. Happy creating! 

Step 1: Getting Started

Footstep 2: Building Your Master Pages
Stride 3: Create Your Paragraph Styles
Step 4: Brand a Cover
Step 5: Wrapping Up


How To Remove Indesign Template Header,
Source: https://www.caseyprinting.com/blog/how-to-design-a-magazine-in-indesign-free-template
Posted by: rosstooll1958.blogspot.com
0 Response to "How To Remove Indesign Template Header"
Post a Comment